

Like a lot of people, I’ve been watching Cashmerette patterns with interest and excitement. There’s so much promise in the premise of plus size patterns actually drafted for plus sized bodies, which are often very different than smaller bodies. Patterns with a swayback adjustment already in? And properly proportional armholes? Sign me up!
Jenny’s style is different from mine though so I hadn’t yet bitten the bullet. I don’t wear wrap dresses although the Appleton is still tempting me and I might have to concede when the weather is warmer. The Washington is not for me, I bought Concord but have yet to make it because I just can’t bring myself to be excited about another knit shirt (maybe when it’s warmer?) and I like Upton but can’t see myself getting much out of a sleeveless dress. I love my sleeves. I had the same reservations about the Springfield top (give me sleeves) but in the end, I couldn’t resist.
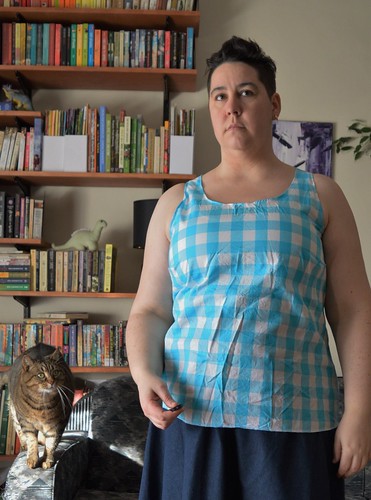
Here’s my lovely, unironed muslin of the top. I followed the pattern instructions to pick a size and made up a straight size 18 in a C/D cup – I’m high bust 41″ and full bust 45.5″ for those playing along at home. And it fit. Perfectly. Right away. Immediately. With no adjustments.
I’m astonished. I admit I was starting to get a bit eye roll-y like yeah yeah, everyone loves cashmerette, but guys. It’s real. Actually here is my real first muslin:

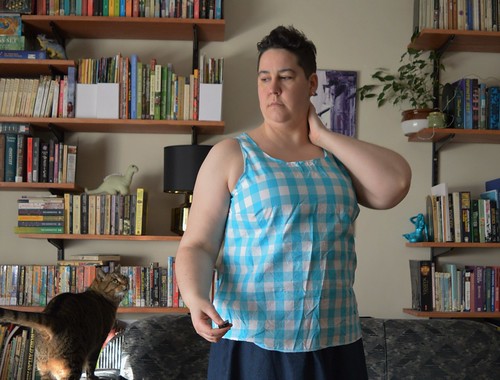
I decided that the straps were a bit widely placed for my liking, and I moved them in an inch. However now they’re too far in and my shoulder and underarm nuggets are too exposed :P. So I’ve now mashed the pattern up with my adjustments so I’ve really just brought the neckline in.

I left the adjusted top as is though because although I was hoping for a wearable muslin, this fabric – I can’t remember where I got it, maybe as a freebie at craft camp? – is very polyestery and I can’t see myself wearing it. The neck and arms are just folded under and stitched which is why they look so crap, but you can get the idea of the fit and that’s what I care about. I’ve kept the muslin and I’m idly considering adjusting it for sleeves, so we’ll see. Here’s the back:
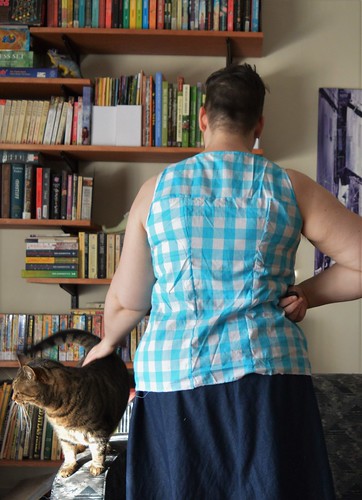
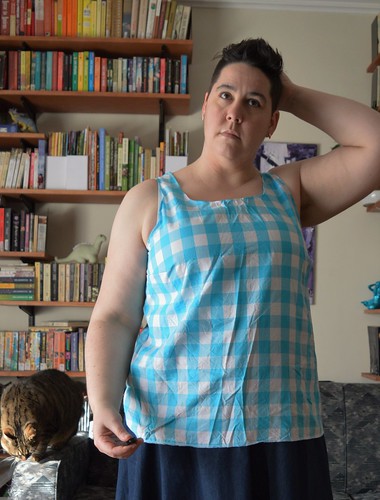
With a vague attempt to pattern match. Princess seams are not the best for gingham but they’re what I wanted to try out! I did go back and sew the upper back with smaller seam allowances (and have adjusted the pattern to reflect this), as well as extending the back yoke each side, to give me extra room in the upper back. I also sewed the side seams a bit smaller at the hip and adjusted the pattern to add and extra 1cm there. But look at that FIT.
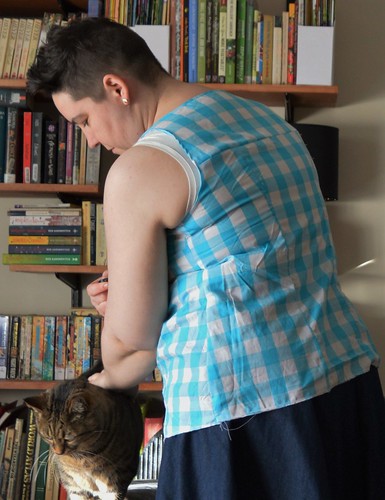
You can see my undershirt there and my bra sits just under that so it’s definitely been brought in too much. But the straps as is showed my bra on the other side.
I do have a couple of small complaints. The first is that the seam allowance on this pattern is 1.2cm, which makes sense I guess since that’s 1/2″. But it means that to do french seams one would have to either sew VERY carefully and neatly, or remember to add .3 to the sides. I wish it was just 1.5cm or even 1cm because that would be easier to remember to add to, I think. I know it’s a small thing but it made me scratch my head, I don’t think I’ve ever sewn another pattern with a 1″ seam allowance. The second is that I found the pdf quite hard to tape together. A couple of the pattern pieces were placed so that there was only a teeny tiny scrap hanging over onto another page, making it hard to tape accurately. And I found it totally impossible to tape the bottom of the front bodice in a way that lined up. It’s possible this was user error but I tape a lot of paper patterns and I’ve never had quite so much trouble. I unstuck everything and tried extra carefully to line it up and it just wouldn’t, so in the end I just taped it in place. I wonder if my having to adjust out the hip was because I was adding back in the room that was meant to be there if the pdf had lined up properly.

However, those are things I can work around, and I think this pattern is worth it.
Once I had my first muslin done I decided I wanted to try something a bit interesting. As I said last time I’m trying to up my casual wear game which is currently made up of not quite successful makes and almost worn out things, which doesn’t make a gal feel put together. I decided I’d like to try a loungewear style singlet. I tend to sleep in as little as I can get away with (TMI? Sorry not sorry) or relatively close fitting things because I roll around a lot in my sleep and in looser clothing I get tangled up and uncomfortable. But I was thinking I’d like some nice, casual things to throw on when I’m planning to spend the morning wafting around looking elegant and having breakfast cooked for me.
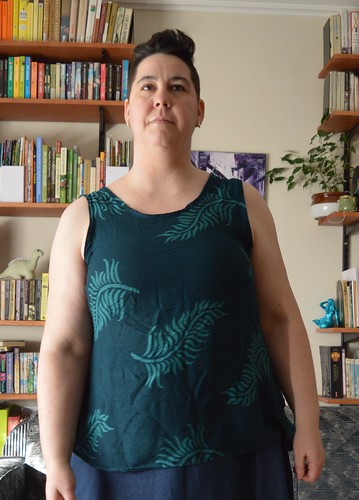
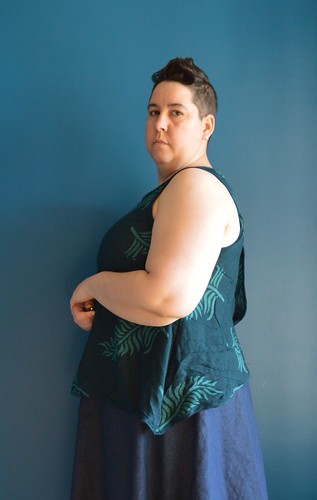
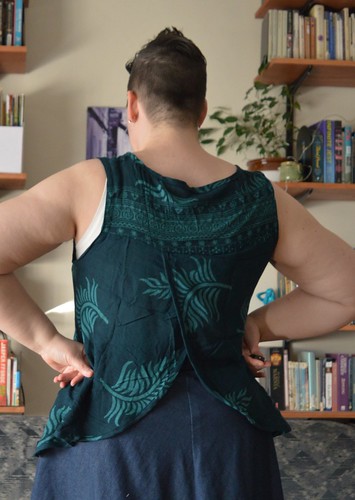
This fabric is one of a couple of rayon sarongs I bought in Bali last year with the intention of sewing up. When I was buying it the shop attendants said it was ‘second grade’ and you know, they’re were not kidding. This fabric was a NIGHTMARE to work with. It had stretched all off grain and was really tricky to cut out and stretched more as I was sewing it. So this is not the elegant thing I was intending, but I guarantee it will still get wear in summer. The back is the pleasing bit, though.

My idea for loungewear was given this specific direction when I saw Lauren from Lladybird’s silkLakeside pjs. I’ve admired this pattern but it doesn’t go up very big – I could get away with using my high bust and an FBA but the shorts are never going to fit. Plus tbh since I wouldn’t wear them to sleep in, I’m probably always going to wear it with a bra because I am not comfortable walking around without one. Even – especially – when it’s hot! (underboob sweat, anyone? And you thought I was done with the TMI.) Flashing a bra strap doesn’t feel fancy to me so the lakesides were out. But a mashup? Perfect.
I was going to just draft the back piece myself since it’s basically just a big curve but a friend lent me her copy of lakeside (thanks Lucy!) so I could trace it off and line it up with the view A plain back of springfield. This essentially involved just lopping the top off the largest size of the lakefield back piece so it was flat to connect with the yoke. I did not think the construction through though and I finished the backflaps with bias before sewing everything together. I should have sewn the side seams and then finished the back and the front together (duh). As a result, the front is a very dodgy double fold and sew, and the bit where it meets the back is very sloppy. That’s ok because it’s sloppy anyway because of how the fabric stretched out.
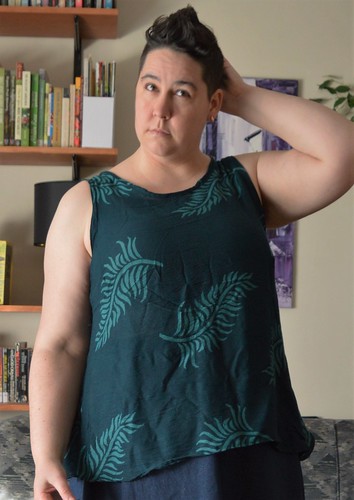
This fabric. Was. A nightmare you guys. A nightmare. I mean to be fair it was not intended to be sewn as fabric, but hoo boy. A nightmare. I finished the neck and armholes with self bias too but I had some issues with it – I think a cutting error due to stretchy, foldy fabric and then a stretching out (I did stay stitch everything as soon as I cut but it is just that loosely woven) means that one armhole is not wide enough and flashes my bra:
I have another sarong in a different print and also some of this sarong left. I was planning on making some shorts to go with it but… I don’t think I can face it. Nothing good can come of this fabric you guys. Nothing. I think the other sarong is destined to remain a sarong.

So all up, this one is a bit of a fail. I bet it will get worn in summer but it isn’t exactly going to up my loungewear game, since it’s yet another not-quite-right make. Oh well.
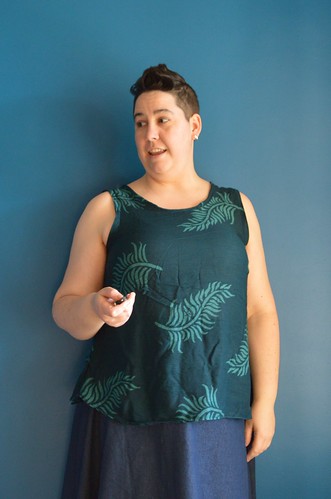
This is the widened straps, by the way, and I’m really happy with them. I’m also happy with the unintentionally great pattern placement on the front and the fact that I will never have to sew with this terrible fabric again. AND the fact that I have a winner of a pattern on my hands in the Springfield!
I do have limited need for sleeveless tanks but one or two will be incredibly useful so watch this space for some non-muslin versions. I will also definitely be making another, better, Lakeside/Springfield mashup in a better behaved fabric.

That is so interesting, I appreciate your honesty and got a chuckle :-). A pity about the sarong fabric as its so pretty, the colors are gorgeous
Thank you! I aim to amuse 😛 I’m hoping I feel happier with the sarong fabric version once it’s spent some time as an FO. It’s always going to have those flaws but often I stop noticing them as much after a while, so we’ll see.
I really enjoy your blog and I love this post! I too have been watching cashmerette with some interest and your honest and unbiased review has convinced me. I too thought I would probably have an issue with the neckline/straps being too wide, so it’s nice to see I’m not the only one!
Thank you! I know other people have commented that $14 ($20 for me with currency) is a lot for a sleeveless shell pattern. I definitely felt that but in the end I do think it’s worth it.
I notice that Jenny from Cashmerette tends to prefer a very wide neckline. I think she maybe has quite rounded shoulders and so it balances out her figure, but for me with my bust it makes me look really broad and top heavy. The good thing about that is that because it’s a design choice it’s easy to readjust it for my own preferences, especially since there are no sleeves involved. I am really hoping Jenny puts out a sleeved pattern but the downside is that will be harder to adjust. Anyway, I’d much rather tweak a well-drafted pattern like this than have to completely re-draw things in a poorly graded up big 4 pattern!
That mashup is such a great idea – I think it looks pretty elegant even with its troubles!
Thank you so much! I’m keen to try it in a more stable and cooperative fabric because I really like it.
I think your batik version is awesome! I’m a bit confused by your comment about seam allowances, though. From what I can tell, the seam allowances are 1/2″. Am I missing something? I’m hopeless at metric conversions, so that very well may be the case, but for french seams I would sew 1/4″ twice. Looking forward to seeing more versions because it looks like a great fit.
Oh thank you for pointing that out, I did mean to type 1/2″ but just didn’t finish it! Yes the seams are 12mm which is 1/2″. I find it’s much much neater to have 1.5cm seam allowance, which you then sew at 0.5 and then 1cm. It makes it much less likely that you’ll catch the turn in your next seam. It didn’t occur to me that others would just do half the seam allowance, since that’s not how I was taught. I guess that’s a failure of imagination on my part!
There will definitely be more, for sure!
Well it’s always great to hear a review about an indie pattern from a blogger you trust. And your mashup is awesome.
Oh no you are making me blush!
The back is genius!
Thank you so much! I’m feeling a bit smug about ti, have to say XD
Your mash up is fabulous. Cashmerette is pretty awesome, but, like you, I too want more sleeves. Patterns without sleeves generally feel incomplete.
Yep. I’m coming around to sleeveless but I do generally want my shoulders covered, if only for sun safety reasons! That said, I’d rather sleeveless than bad armscye/sleeves and I know from sad experience that drafting sleeves for plus sizes is hard. So maybe one day Jenny will get to it?
The Appleton has great sleeves. Concord does too. Maybe it is hard to draft woven sleeves that would fit all of her demographic?
I suspect so. Knit sleeves give you a lot more wriggle room – both literally and figuratively!