

Hi folks! It’s been a while, huh? I have to say, 2017 kind of kicked my butt. Not anything major, but lots of small and medium sized things all got together to make sure I was just exhausted at the end of last year. As a result of that I took a break from the internet. And I have to say, it was honestly pretty great. I’m still on a slow down. I haven’t reinstalled instagram and I don’t think I will any time soon. But here I am blogging at least.
This is an old make, now! I took the photos in November, edited them in December and now I’m blogging them at the end of January. That’s how it goes. It means it’s extremely unseasonable for me (today’s high is going to be 41C!) so I guess this one’s for you Northern hemisphere peeps!
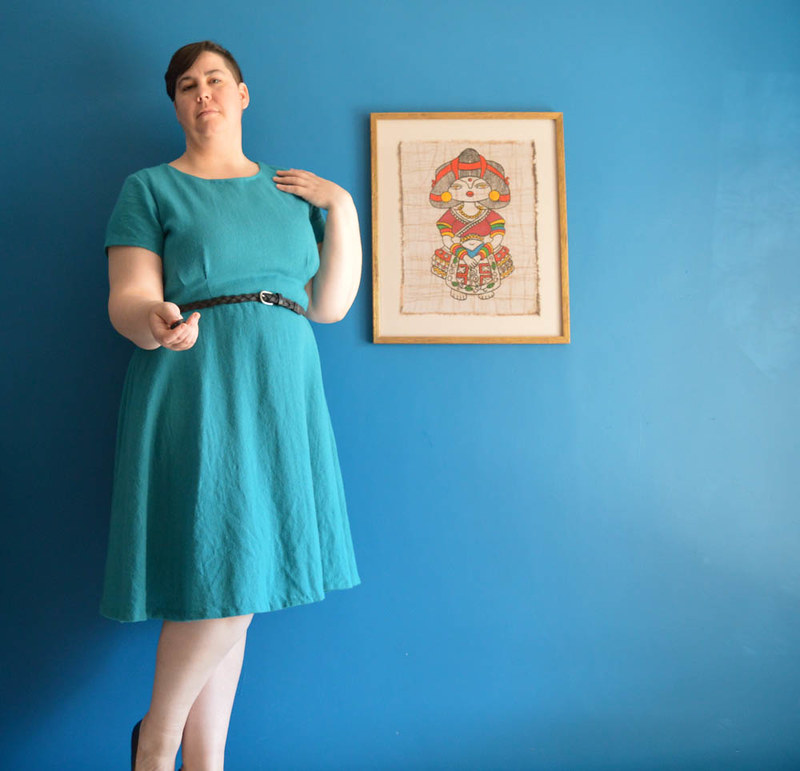
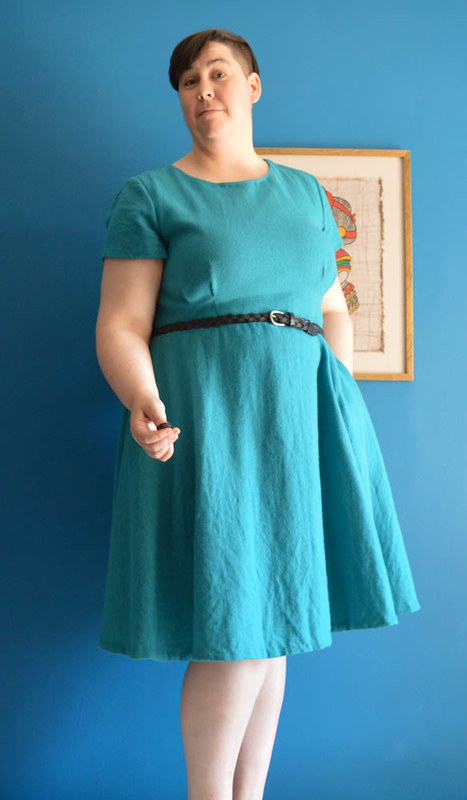
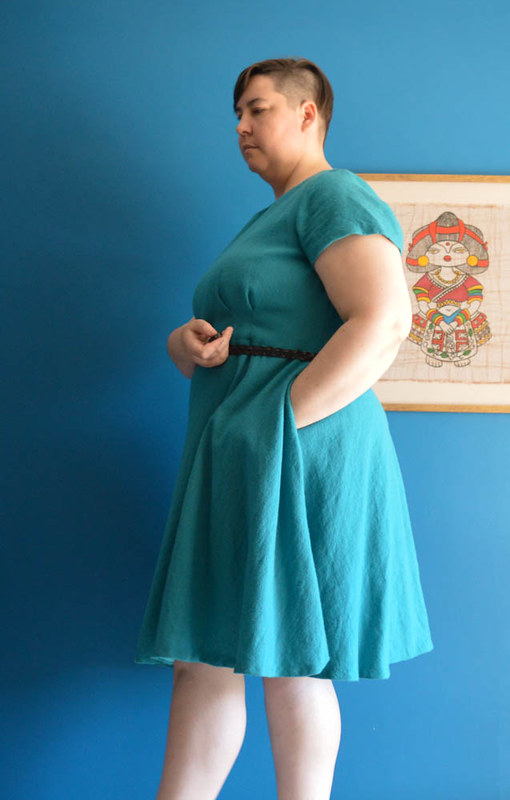
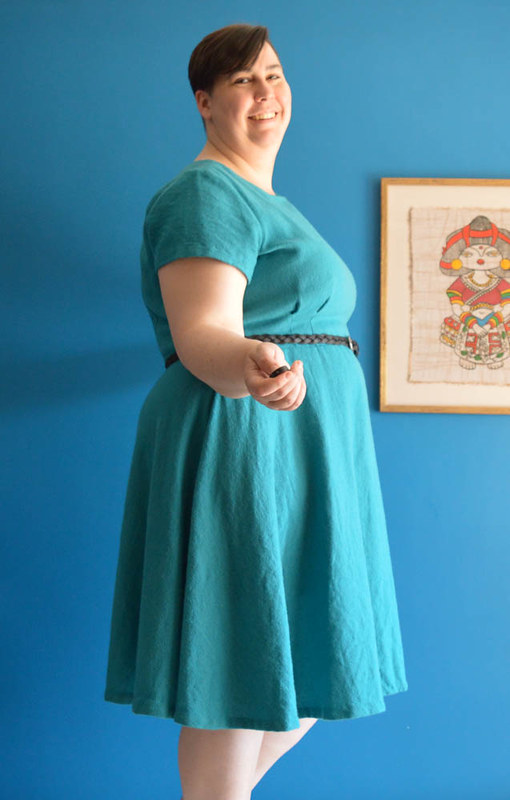
This is the Laneway Dress by Jennifer Lauren Handmade. This pattern came out right after I had finished making my Juniper cardigan and I was so pleased with that pattern that I bought Laneway and taped it up immediately. And then ofc I didn’t do any of the actual sewing until September craft camp. Nothing like being timely… As an aside I can now report that, with the fix on the button band and the change of seasons, the Juniper cardigan is getting a tonne of wear.
I auditioned a bunch of different fabrics for this dress with different ideas for that split neck but in the end I decided to make the ‘bonus’ plain neckline because trying to figure out what combo to make was holding up the actual sewing. I love the look of the split neck on others but I know I’m going to struggle with fabric pairing. It’s the perfect opportunity to use a busy print or a colour you don’t want near your face, and then break it up with a contrast facing. On the other hand… I’m really a plain colours, simple shapes kind of gal, ya know?

I settled on this fabric because while it’s not precious, I do really like it. It’s been in my stash for a while so if the finished dress was imperfect as the first version of a make usually is for me, I wouldn’t mind too much. It’s more teal wool that I uncovered from my stash when I made my Horseshoes skirt. This one I do know where it came from! I bought it from DK fabrics when I used to work near there, so at least seven years ago. I bought it with the idea of making a coat out of it, LONG before such a thing was within my skill range but there’s nothing like optimism. Also I only bought three metres which is nowhere near enough to make a coat. The label said dry clean only but that’s not how I roll so I washed it on a delicate cycle and it came up all crepey. Which I was mildly bummed about at the time but now I really like it.
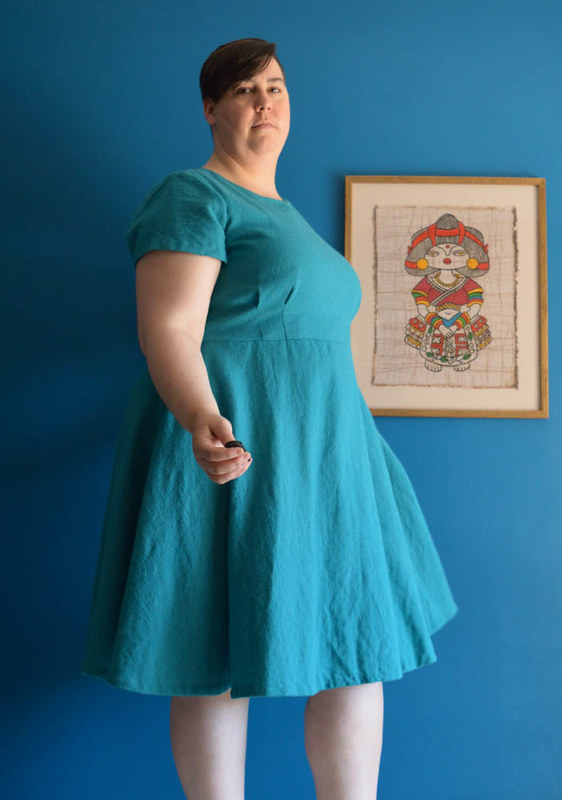
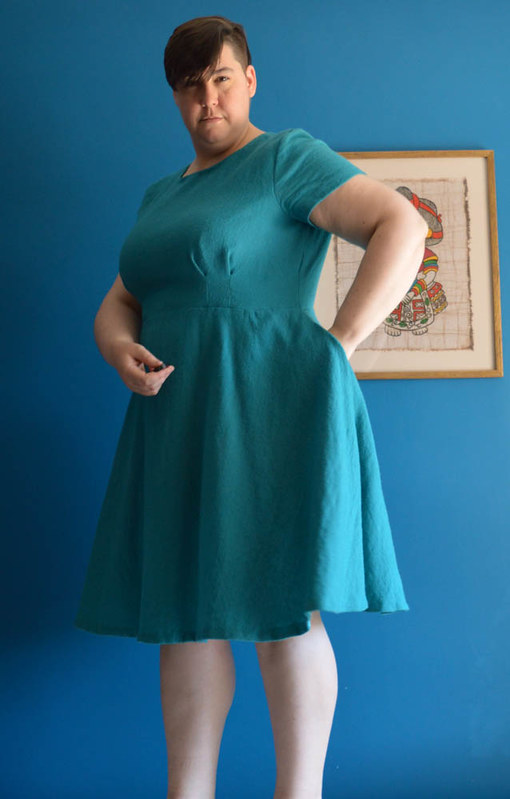
So anyhow. This dress has cup sizes, which is so nice. I sewed the D cup, size 18 at the shoulder, 20 at the bust and 24 at the waist. My muslin was really long at the waist – I think perhaps it is meant to be, because I see a lot of the makes popping up are also sitting at people’s natural waist. I don’t like that on me because 1) it’s not the silhouette I prefer and 2) I like a fitted waist but if I have it fitted at my natural waist there’s nowhere for my stomach to go when I sit down. If the waistline is at my high waist, there’s enough room in the skirt for my stomach to expand below the waist. So I took 2 inches off the bodice. The instructions direct you how to do this properly but I just folded the pleats in on the pattern piece and then lopped off 2 inches. It worked pretty good! I also took an extra centimetre off the centre front where it curves down, based on how the muslin was sitting. But I ended up adding that back in when I sewed the fashion fabric – I think the muslin was pulling forward because of the high neck (because I forgot to either cut the split or cut the lower neckline in. Duh) so I’ll go back and add that curve back into my pattern.
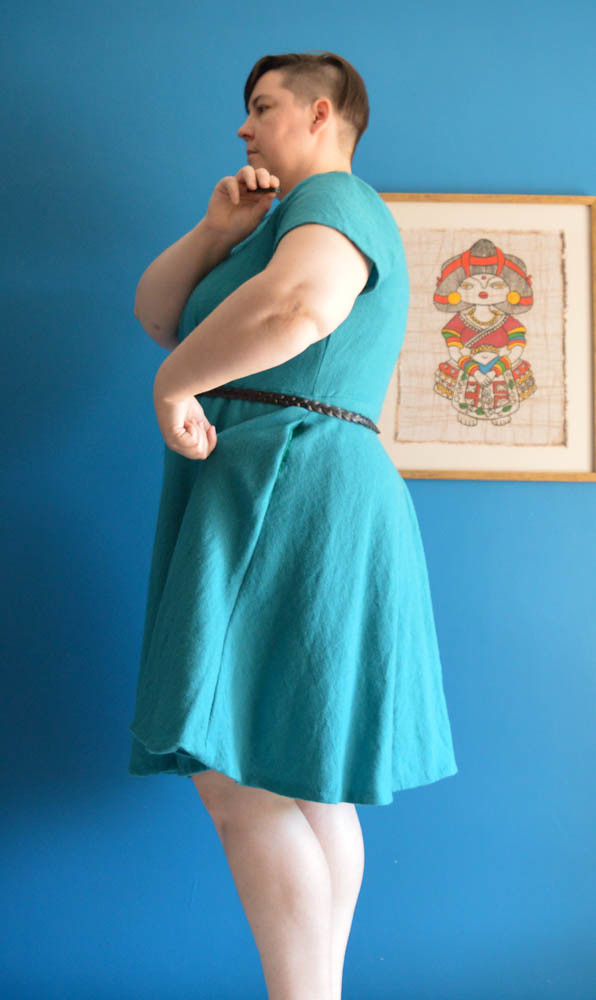
I’m not 100% sure what to do with the waistline in my next make to be honest. There’s some slight fit issues with where the neck is sitting that’s making me unsure – I think I will fix the neck issues (all based on my body not pattern errors or anything!) and see about the waistline later. The other thing is that this wool stretched out on the bias quite a bit after sewing – I was expecting it on the hem but it also stretched on the bodice! It’s quite loose so I shouldn’t have been surprised. Anyhow it’s longer at the sides now, and the waistline is obviously uneven. I should go back and fix it but I don’t really care enough, if I wear a belt with it it’s not visible. But now I’m questioning everything because I like the lower waistline! Maybe I need to revisit my muslin.
I also sewed the pleats higher up – so they’re the original length (because shortening the bodice shortened them) but finish higher up. Originally they were looking very cavernous which is not really my best look. But I remembered reading a blog where someone talked about pressing the pleat to the centre – I can’t remember who sorry! So I did that and they sit much nicer. Very pleased with them now!
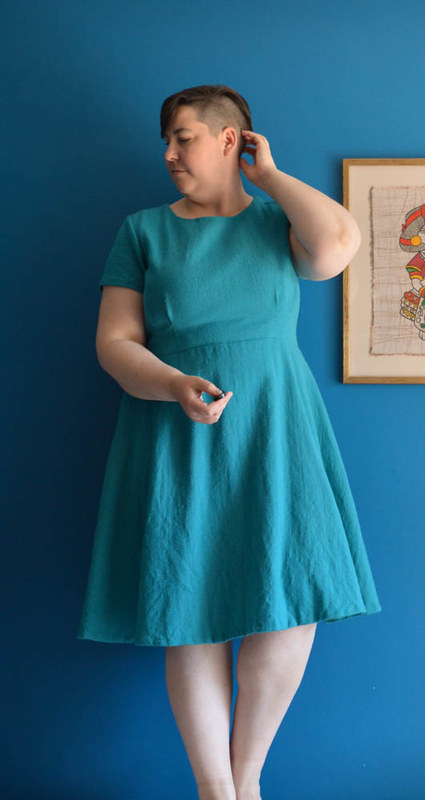
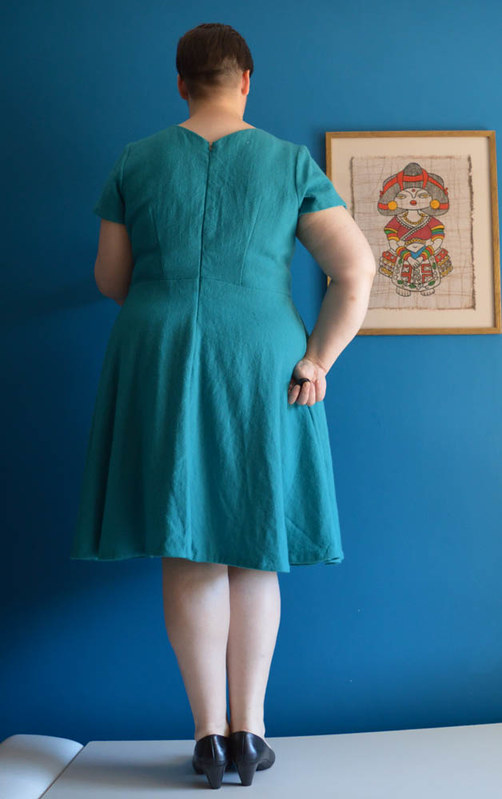
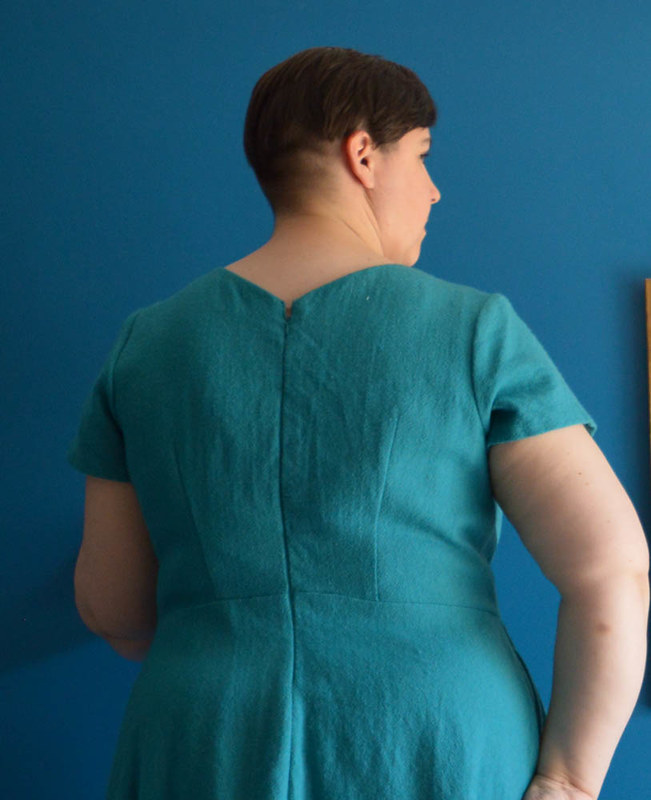
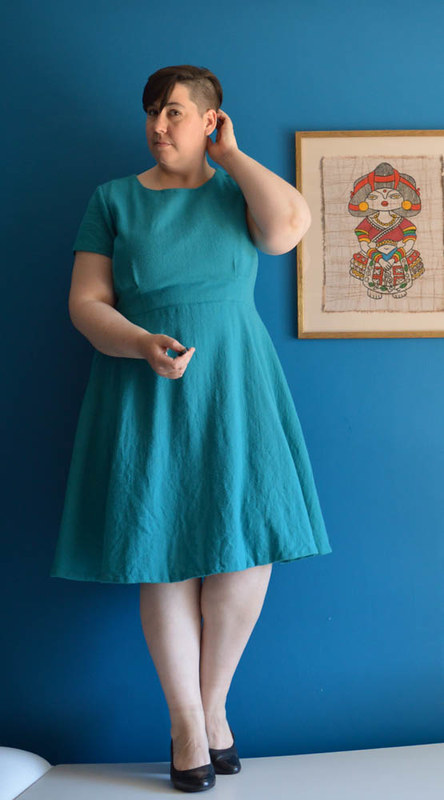
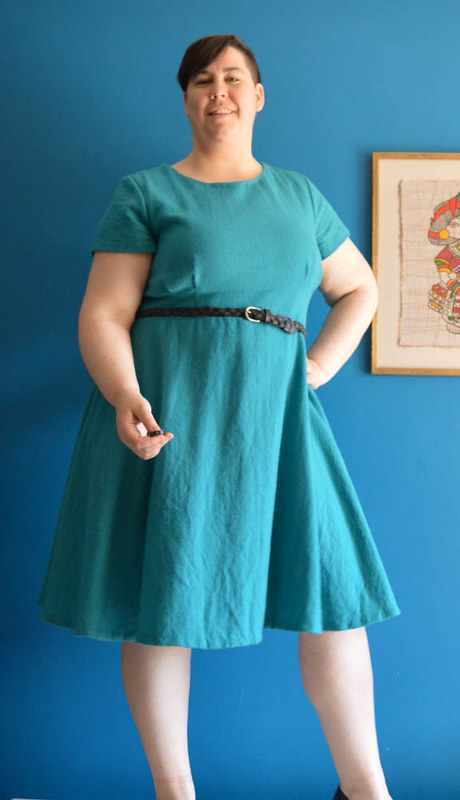
I brought the neckline in 0.5cm at the shoulders and brought the back v neck up 1.5 cm because I liked how the muslin was sitting without the seam allowance used up. I am on the fence about this – on the one hand it kind of looks like I just mucked up a normal neckline and cut it too low. On the other hand the lower neckline really emphasised my dowagers hump. So… whatever. It feels more comfortable where it’s sitting now whereas the lower neckline always felt like it was falling or pulling backwards, so I’ll probably do the same thing again in the future.
While we’re talking about the neckline, after wearing I can tell the neckline/upper torso fit is not quite right. It sits ok ish but when wearing a jumper the centre front folds in and is very annoying. I think I need to take about 1.5” out of the centre front neckline – this is a pretty usual adjustment for me because poor posture and a low bustline gived me a hollow chest, and with cup sizes in patterns this is often emphasised. The shoulder/armhole seam is also sitting slightly off my shoulders, not enough to be a poor fit as such, but enough that my perfectionist overfitting tendencies are annoyed. When I pinch that extra out that issue is resolved. I may also move the shoulder seam back 1cm, or I may just lower the neckline – I’m not sure at this stage what I need. This is a new adjustment for me so I haven’t quite worked out what works best for me.
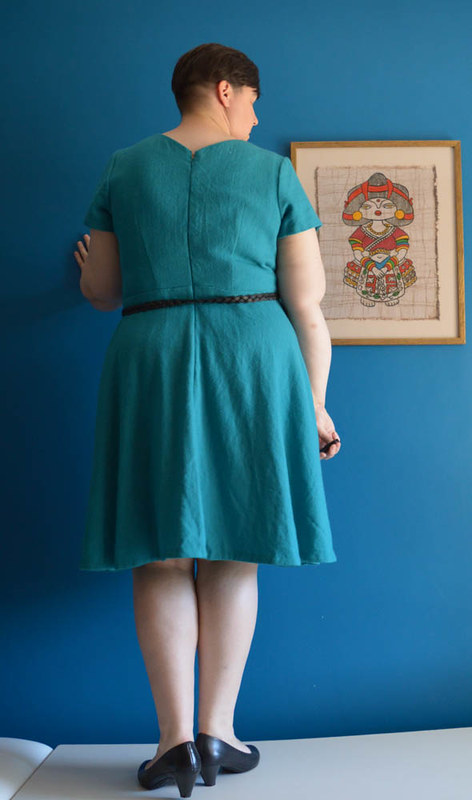
I took a 2” vertical wedge (I think? I didn’t measure I just sort of pinched it out) at the centre back seam because I had some serious pooling there. I also ended up taking the extra width I’d put in at the side seams out again. I’m not sure if this was because the wool is heavy but a relatively loose weave and stretched out. The muslin still fits how I would want it to so if I make this again in a firmer fabric I’ll still keep the extra width because it’s easy to take it back out.

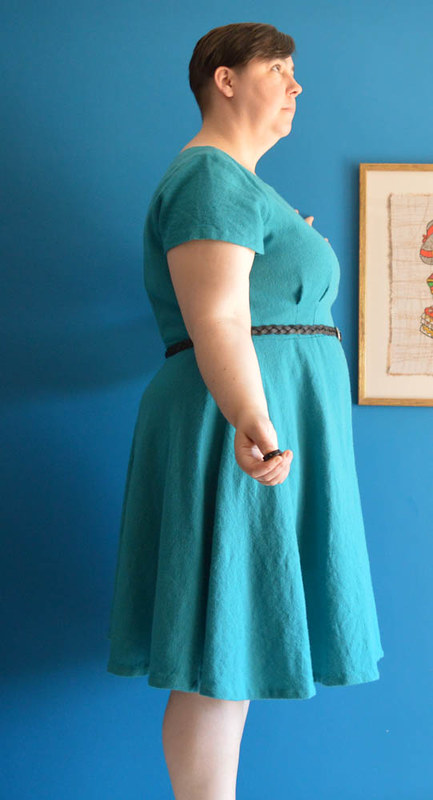
Also, guys, I am in love with these sleeves. They FIT right out of the packet and they set in so so easily and they are just the perfect proportions. I always have so much trouble with sleeves and the armhole and sleeves in this are drafted just PERFECTLY. I’m so impressed. I can tell I’ll be subbing these in on other patterns to get a good fit. A well drafted pattern is just a joy, and this one was so well drafted. Everything was well thought out to make it easy for the end user, and went together perfectly. I will continue buying and recommending Jennifer Laurence Handmade patterns because boy. They are just so pleasant to use. A real treat.
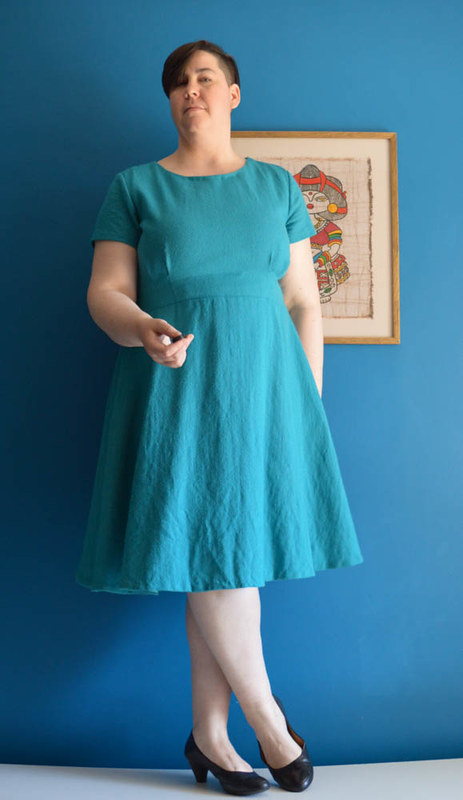
I did change up the skirt a little – I prefer a longer and a more circular skirt than the A line that comes with it. I was rushing to cut this out before the end of craft camp so I just laid my circle skirt pattern over the top and cut the waistline from the Laneway and the side seam from the circle skirt, which was not the correct way to do it. It means there’s heaps of extra fabric just at the side, and as a result the pocket folds backwards and sits maybe 2″ further back than it should. I initially thought the side seam was in the wrong place but if I pinch out that extra fullness on the lower skirt, the pocket sits right. So next time I’ll do it the way I’m supposed to.
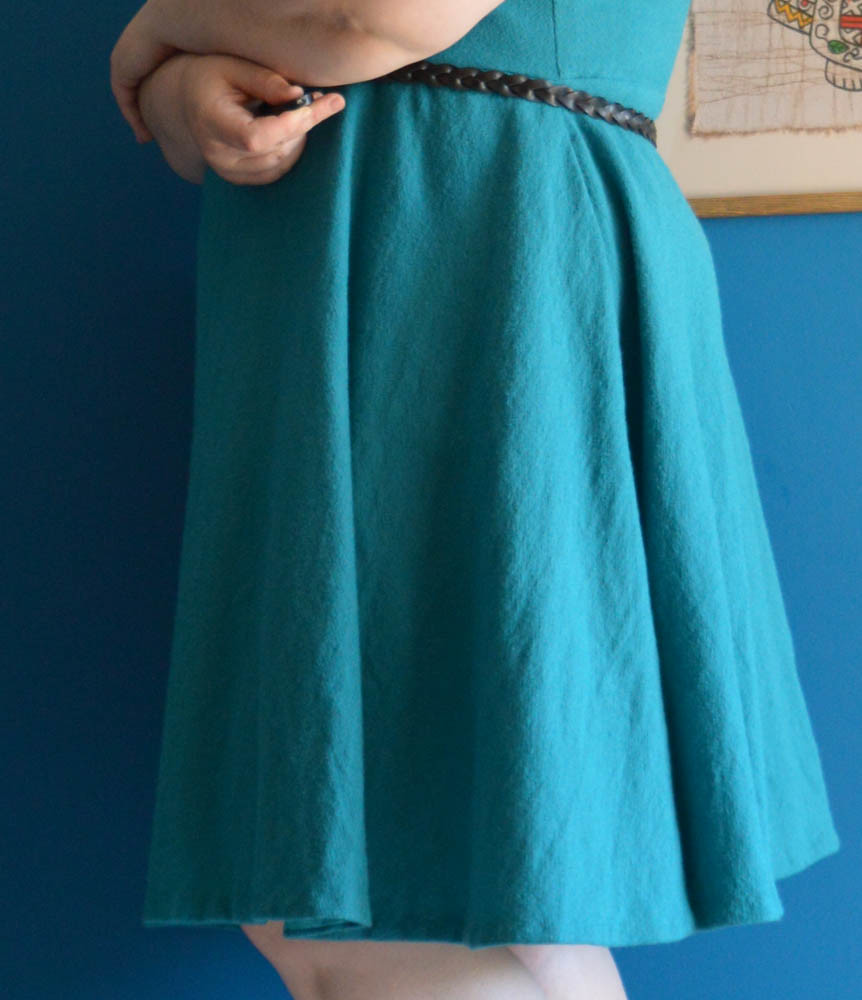
I cut the skirt 1” longer, but I wish I’d done more. I wish I had another inch or so, especially because this is a winter skirt. As is it’s a bit short to wear with long socks without looking v twee. I didn’t want to loose any more length so I hemmed it with bias tape, which I think also gives this light wool some heft. The tape is from an opshop so there are two different colours, which makes me smile when I see it.
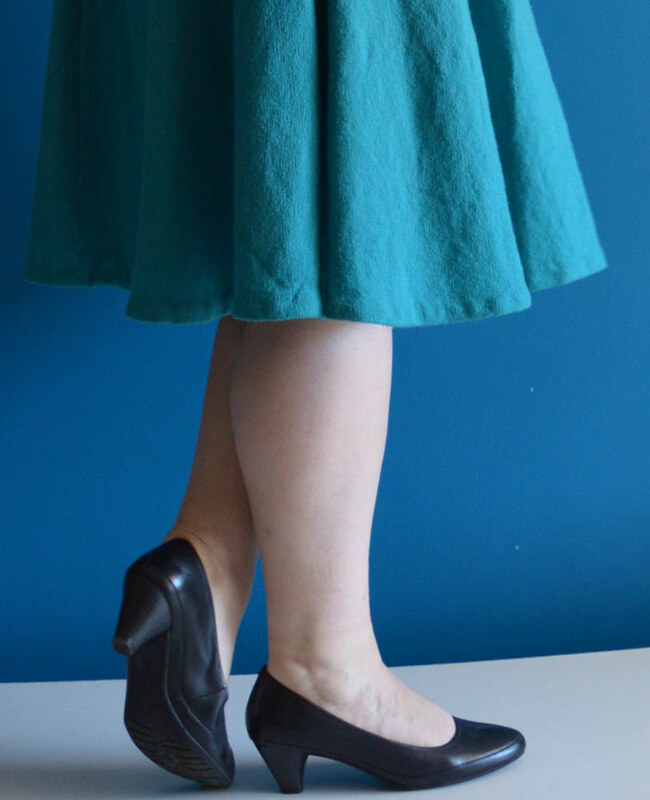
The hem fell a BUNCH and I got S to help me measure it with a singer mini-max hem ruler that I got from the same op shop where I scored all the bias binding – maybe from the same person’s stash? I am in love with this thing, it makes everything so easy – S is a willing helper but not a sewer so he’s happy to help as long as it’s clear what he needs to do. Here’s a how to video.
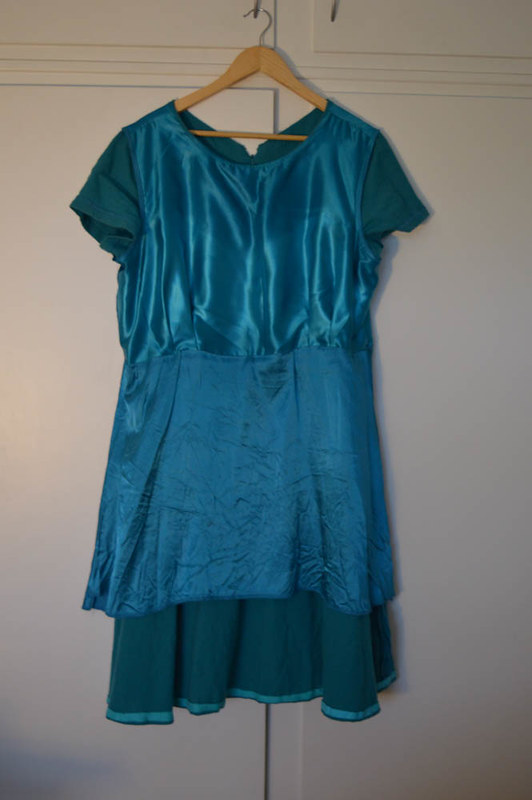
I fully lined the dress. It comes with facings but the wool is pretty loose and I wanted it to be a winter dress, and warm, so I just cut the pattern out in bemberg as well and used that to line it. I used the original skirt pattern for the skirt lining and broadcloth scraps for the pockets. As I said I perhaps should have underlined the bodice rather than lining, but oh well. The only downside is the bemberg is actually quite warm, and if I sit in the sun at lunch I come back to work all sweaty. I doubt this will be a problem in midwinter though!
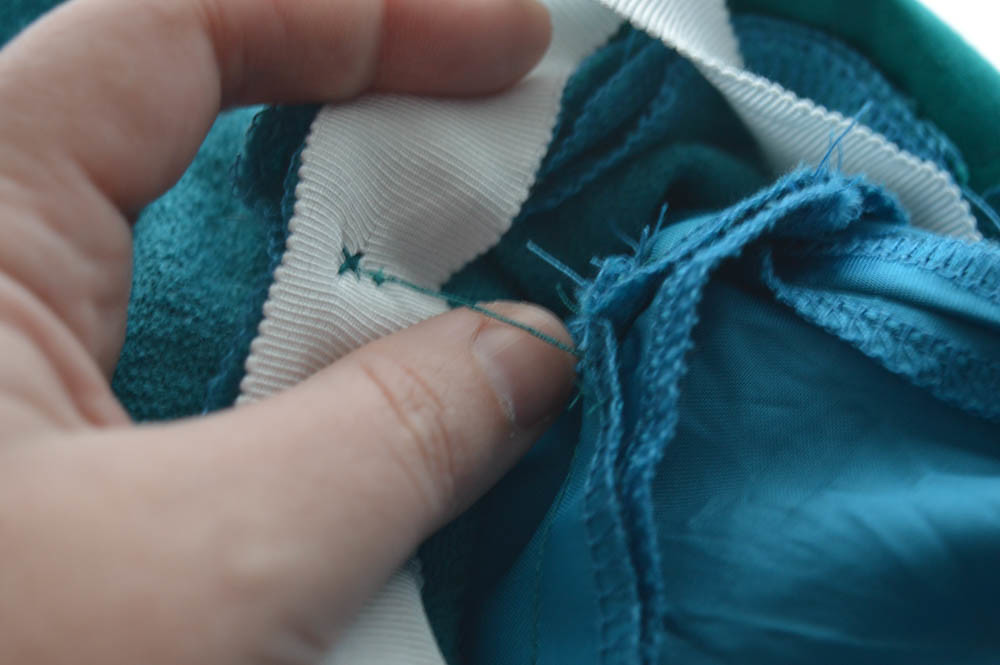
The neckline was pulling and flipping so I hand tacked it down, which is a bit visible because I did it AFTER tacking the lining to the fabric at the waistline so I had to do it through everything, not from the inside. Again, I’m not too fussed about it.
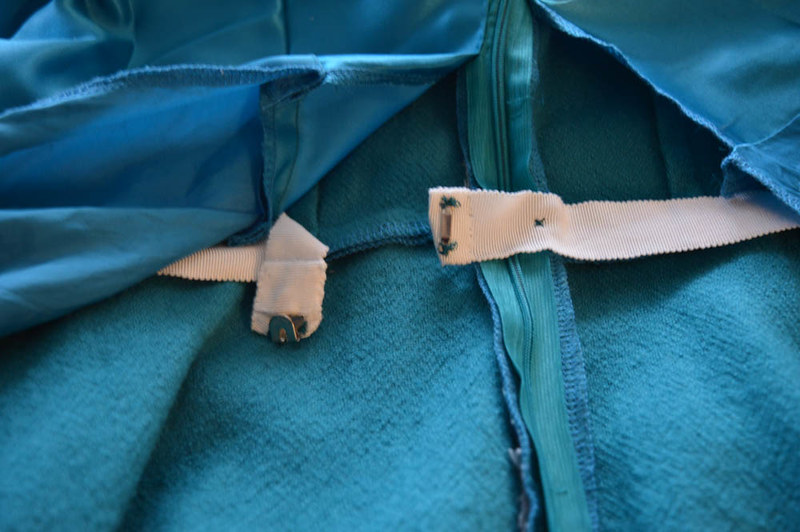
I did a lot of hand sewing on this. I tacked the lining to the shell, as I said. I also did my first ever waist stay, because of the loose weave of the wool. I think I’m sold on them! I really like how secure it makes the dress feel, and it was very easy to do. Although it does make getting the dress on less simple. Oh and I also mucked up the zip and lining bit – because I was making up the lining myself I didn’t think far enough ahead and put it in before I did the zip, so the zip couldn’t go all the way to the top, so I just put in a hook and eye. Not perfect, but good enough. Also I wish I’d gone with my instinct and done a regular zipper for this, because the waist is bulky and the zip shows there.
Reading this back this sounds like a litany of flaws but that’s not at all how I feel about this dress at ALL. It’s not perfect, of course. But all the issues are very minor, and mostly just noted for myself for next time. Often when a make has this many little things it’s annoying to wear, but not this dress! It’s so comfy and lovely and I feel a million bucks in it.

There will ABSOLUTELY be a next time for this pattern. I really love the shape of this dress, and the drafting, as I said, is just so excellent. I know I’m gushing about it now but seriously I’m not over how much of a difference it makes to everything. I guess I’m now a JLH fangirl!
The writeup for this dress says “The Laneway Dress blends comfort, whimsy and the unexpected into one perfectly tailored dress. With a sleek yet easy to wear 1940s A-line silhouette, Laneway will be your go-to dress for everyday adventures and beyond.” I always roll my eyes a bit at the spruiking for patterns but you know what? It’s spot on. I also think this dress will look really different in different fabrics, and will be a good jumping off point for alterations and hacks to make it more interesting. I’m really looking forward to making this a TNT! I definitely need to sew myself one in lighter fabric for summer and autumn because I miss wearing this dress!

Ooo, this wool is so beautiful. Not that I can really think about wool on hot days (it’s going to be 41 here today too). Bring on winter PLEASE.
I’m also a rebel fabric washer. I mean, who has the time and money to go to the dry cleaners really. We all know that fabric is going to end up in the machine at one stage or another so may as well wash it now.
I hate to be that guy but I think your neck issues might be related to your bust. Fit problems tend to point to the source, so do you see how the neck forms a little tuck that points to your bust? And your armhole does too? To me that indicates you need more fabric in that area, so the openings can relax and lay flat. That said, I never bother with bust adjustments anymore because I just don’t care if they don’t fit “correctly”. But you might have more luck with the neck if you address the problem at its source.
Isn’t the weather dreadful? I like the heat in general (well, in comparison to the cold) but 41 is TOO MUCH. I generally prefer it to be colder outside my body than in, THANKS.
Hmm, do you mean it should be bigger at the bust? Or that the shaping there is not right? It feels like a comfortable fit size wise at the bust although I’m open to trying a size up, you never know! The fixes I were thinking of are basically reverse engineering an FBA from a full bust that fits – reducing the upper bust instead of going down a size (for a smaller upper bust) and doing an FBA. I definitely always have this problem because I have comparatively narrow shoulders and rounded shoulders so I’m basically a ‘C’ if viewed from above.
But yes, I’m generally on the ‘close enough’ train, as long as it’s not actually constrictive or uncomfortable. On wearing the only thing that bugs me is that the neck is a bit baggy so it’s hard to put a jumper on and have it sit comfortably, and it’s not as long as I like. I see in these photos that the back waist is a bit high but… I feel like I should care but I don’t. It feels comfy, and I reckon I can fix the neck in a way that leaves everything else the same and that’ll do. But maybe next time I muslin something I’ll try a bigger bust and see if that helps.
I wonder if it could be slightly bigger. Like, if you tried on a muslin and cut open a traditional FBA and pinned or basted in fabric in those spaces, would the tucks actually disappear. Which is what I used to do to test alterations but just seems like too much hard work now!
I love love this dress on you! As soon as I saw it, I thought “This is what I wanted the Colette Peony dress to look like on me but never quite achieved!” That was my favourite dress pattern back when I sewed wovens. I”m glad to read that you love it, even with all the little changes you’d do next time!
Thank you so much! You’re right, I never made the Peony but I always looked at it longingly because I wanted it to be like this. I feel so good in it.
Basically i’m never happy, fit wise 😛 Trying to get better at noting things to tweak without making it sound like I’m not happy with the current make. This one is pretty good, and I really love wearing it.
Also I love the way you talk about when you sewed wovens like it was your misspent youth! XD
Another great make. The dress looks great on you and you look comfortable in it. A closet keeper for sure. Congratulations on your waist stay too. Someday I’ll tackle one of those.
Thank you! That’s the key I think, feeling comfortable in it. The waist stay was a bit fiddly but easier than I expected it to be. It probably helps that I like hand sewing though!
I prefer hand sewing. I’ve been trying to figure out if I can do some hand sewn garments, just to get a few things sewn.
I have been thinking the same. I have all this dead time on the train and it’s too hot to knit at the moment. I bet I could hand sew a dress faster than I could machine sew it, just because I have so much more time available to me that suits that. I’d have to practice my stitches though, I’m not very consistent!
Embroidery is great for practicing even stitches.
My problem is I cut my eye teeth on cross stitch and only recently took up more free form embroidery. I do OK but my straight stitches are AWFUL. There’s only one way to fix that though, so maybe I’ll just go for it and hope I improve by the time I get to any crucial seams!
I would recommend marking the sewing line and the using a sewing motion rather than the up and down poking motion of cross-stitch.
Lovely colour, lovely style as you a few tweaks needed.
A suggestion have you thought of taking a tiny bit up at the front neckline on the shoulder seam and then allowing a little bit more under the bust.
I think it looks great well done- you’ve really nailed your style
Thank you! I think I might need to do a forward shoulder adjustment which would essentially do the thing you’re suggesting (I think?) and might also fix the back waist sitting a bit high. But this is an adjustment I’ve only just worked out I need so I haven’t quite worked out how to do it. I’ll get there! 🙂
Your dress looks absolutely gorgeous on you! Teal is definitely your colour! ❤ ❤ Welcome back to blogging. I missed your posts!
Thank you!! It’s good to be back 🙂
yayyyyy I’ve missed seeing your face around these parts! isn’t the weather dreadful at the moment? although the cool change has hit Melbourne and I actually thought “hmmm I feel a bit cold” as I got off the train, which was certainly novel.
I looooove this dress on you, and I can tell you are delighted with it! The colour is perfect, and the shape is just right ❤ I have many of the same fit issues you do – rounded back, low bust/hollow chest. I do an FBA on most things now, but my quick and dirty if the FBA doesn't solve everything is to just fold out a little wedge in the front neckline. Not perfect, but does the trick. And I'm not questing for perfection either – just comfortable, and better than RTW (a low bar to clear, to be fair).
❤
Yaaay! I miss seeing your face also, maybe I should rejoin insta because I miss seeing what people are up to. I actually WAS cold yesterday because the cool change hit and my coffee spilled in my bag and luckily my jumper soaked it all up and saved all my other things but then i was cold all day! Made a nice change I guess. Also I got rained on.
Thank you! It already fits so much better not only than any RTW thing I’ve ever had but better than any other dress I’ve made. I’m being a bit fussy so I think I will pinch out that neckline wedge and leave everything else as good enough. I’m just trying to clothe my bod, not win any sewing awards.