


This shirt has been many months in the making! Fair warning, this is a very long, very picture heavy post because I’m just so pleased with this shirt that I took a squillion photos and had trouble paring them down as much as I usually do.
The pattern is the Sewaholic Granville shirt http://www.sewaholicpatterns.com/granville-shirt/ A lot of things came together to make this a slow project. It had its frustrating moments but in the end I am really pleased I took my time on this one.
I started muslining this in August, and although I took good notes that’s long enough ago that the details have started to fade so I hope I can get everything I did down. I have to say, by the way, how grateful I am that I have gotten into habits of taking notes as I go along. So useful.
Anyways, I muslined this at the very start of August. I muslined a size 16 which is for a 41″ bust, and did an initial FBA of 1.5″. This is what it looked like:

Thank goodness for Instagram too, because it is helping keep track of what muslin is which. I ‘grammed this noting that I had done the 1” FBA but needed another 0.5”. I had been reasonably sure I would but wanted to do it by increments since I wanted a close fit. Also the sleeve is SO long and SO SO tight, to the point where it was actually cutting off the blood to my hand in this photo. I had read everywhere over the internet that the sleeves on this shirt are tight and long but just forgot to do anything about it.
Here’s my second muslin – the green side is the same as muslin #1 and the white side is the adjusted side:

I added an inch to the sleeve and it’s still way too tight. I noted on this muslin that I should try a narrow shoulder adjustment (as suggested by Andie on my insta post of the first muslin), and perhaps add room at the hips.
My sewing machine then went in for a service which slowed me down. When it was back I made a THIRD muslin. This one is a size 16 graded to an 18 from the waist down, with a 1.5″ FBA. It also has had the yoke slashed and spread to add an extra couple of cm in it, and the back princess seams bumped out at the top too, to give me more room in the upper back. I didn’t note it exactly but I think there’s a total of 1cm added across the back.Here it is, in brown bedsheet this time:

This one has a darted sleeve, which I drafted using this tutorial from iconic patterns. I muslined the darted sleeve in my 2015 Christmas dressand really liked the way it sat, and have been wanting to try it in an actual garment ever since, since I went with no sleeves for that dress. Drafting it was really fun! I forget how much of a thrill I get from drafting, I really need to get my moulage finished and do more of it from scratch. I also did a bit of fiddling around and experimenting with sleeve cap height and width and shape. I didn’t take super great notes about this, unfortunately, but it was really interesting how drastic the difference was even with quite small changes.
For ages I’ve been widening and flattening my sleevecaps, as per LiEr’s advice in this post – and also I know I’ve seen other people mention that it gives more movement room. However when doing this I found that there was definitely a sweet spot. If it was too low and wide I got the same sort of pulling at the armpit that I get with a too-tall sleeve cap.
I have always found it hard to fit the area around my armhole and bust – I end up with fabric pulling one way or the other, no matter what I do. Even with an armhole dart, like in my teal M6696, I end up with pulling – that make now is coming apart at that seam in fact, so there’s clearly stress at that point. That sleeve was quite tall and thin, I guess the point where it’s straining is exactly where a wider cap would have more fabric. Maybe I am making slow progress on understanding sleeves. Maybe.
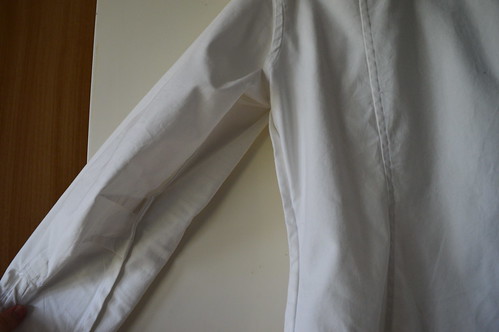
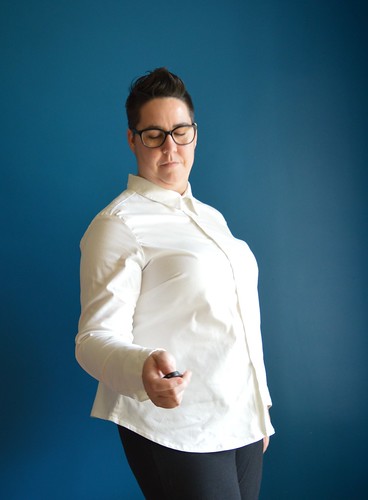
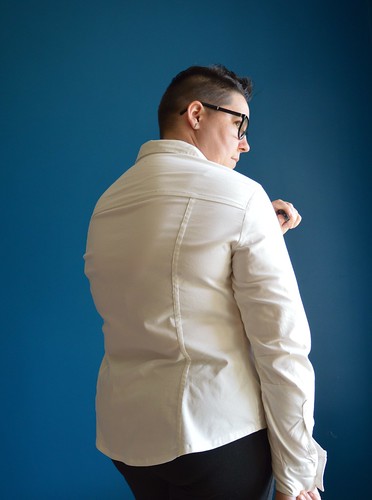
You can see that there is still a small amount of pulling, as well as some pooling of fabric when my arm is down. I think I would benefit from taking a dart at the armpit and rotating it out into the bust dart but then again, that curve is already quite sharp from my large FBA so I’m not sure how practical that is.

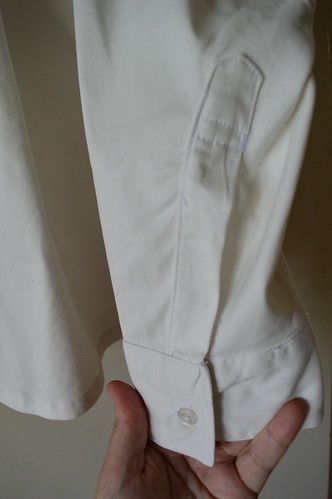
The final sleeve is a size 16, darted + a full bicep adjustment of 1″ made + an extra 1cm added to the seam allowances at the end as it was still a little too tight. I also shortened it further because the darts mean that it doesn’t pull up as I move, so it can actually be exactly wrist length without looking like it doesn’t fit me when I move. I neglected to note how much I shortened it by, whoops.
Anyway, that third muslin was still a little bit tight but I thought that since the sheet I made it from had zero give, and all my intended fashion fabrics had give, that I could probably go ahead and make it up.
I have a bunch of shirting fabrics that I bought from the Fabric Store probably about a year ago, intending to make a few plain white shirts. I was only going to buy one shirt’s worth but ended up buying four because when they sent out the samples I kind of fell for all of them. I’m a sucker and I can’t resist a good shirting. The one I used for this is a bit heftier, and I didn’t keep the swatch so I don’t know the exact composition but from memory it was a small percent of lycra in it, so it’s a bit stretchy.
When it came it was a bit more ivory than white, which I hadn’t noticed in the swatch – you can’t really tell in artificial light but in daylight I can definitely see it’s more yellow than the white thread. This meant I was feeling a bit less enamoured of it, so if I arsed it up I wouldn’t be too sad. I also figured the stretch would cover some fitting sins so I could launch in to it without more (frickin’) muslins and anyway at a certain point the only way to fit something further is to make it up and wear it in real life.
Anyway, I totally burnt myself out on all those muslins, and wanted to sew quick and fun things for my Bali trip instead, so I shoved all the muslin pieces into a box and folded up the adjusted pattern pieces and put it all away, until right at the end of last year (literally December 31) when I wanted to sew something and I didn’t know what. I figured this was all muslined and ready to go, and I was feeling guilty about having put in all that work and then left it right at the end. So off I went.
I went slooooow because, honestly, I just wasn’t feeling it. I wanted to sew but every time I got this (or any other) project out I just felt ‘ehn’ about it. Also I was coming off the Connie blouse and trying to learn my lesson from that about not rushing things. I wanted to be happy with the job I did of this shirt, whether or not the fit ended up turning out. And I was hopeful that since what I wanted was the process of sewing, I could enjoy that part if nothing else, and practice some skills (including patience!) in the meantime.
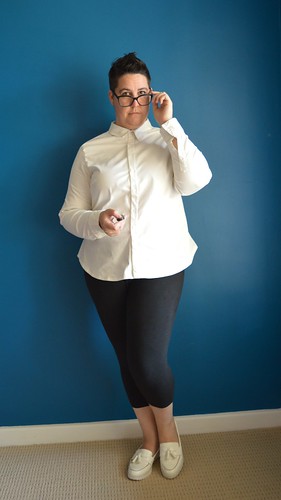
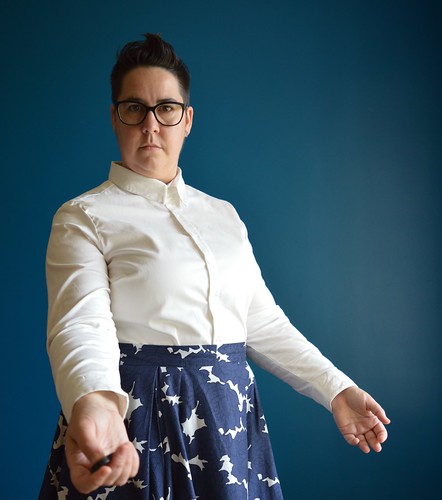
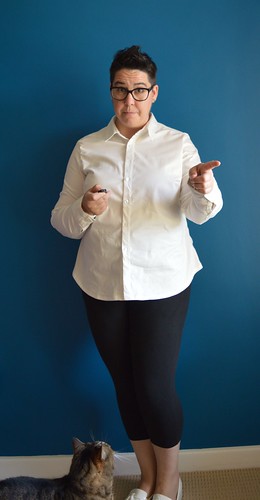
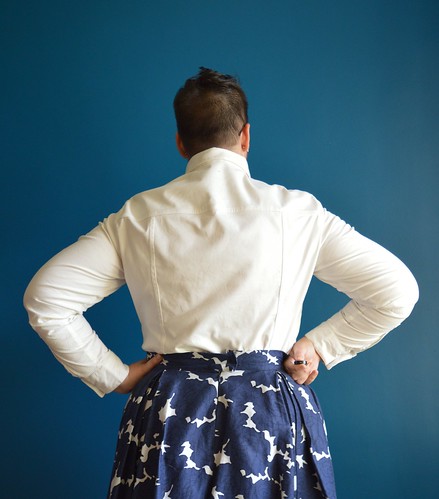
Channeling the Rock.
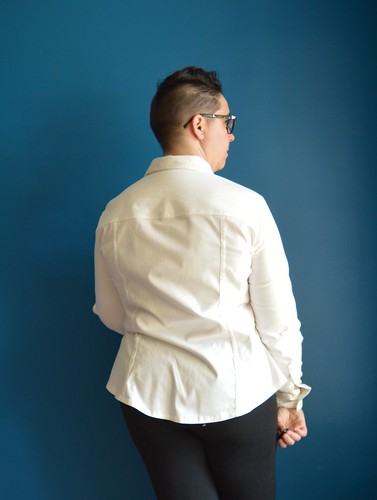
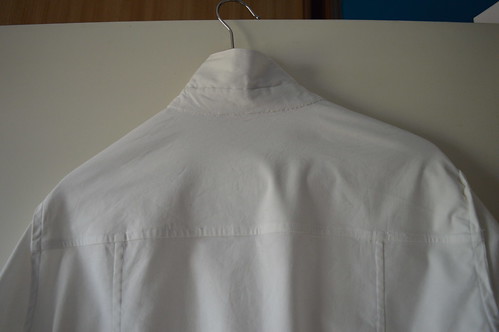
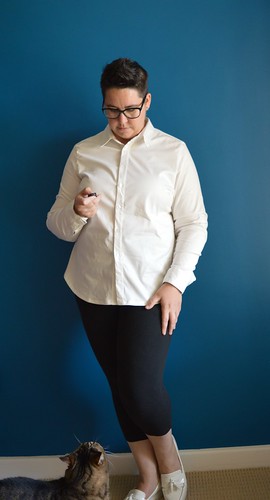
It’s not perfect, but I’m proud of the work I did on this. I flat felled the back seams – they’re a bit wonky, next time I won’t clip the notches because that meant I had to tuck those areas a bit deeper in than the rest.
The sides are French seamed and everything else is finished in another seam. I initially put the collar together per the instruction order before getting confused and reverting to Andrea’s order. much better. I slip stitched the collar closed, so everything is lovely and near on the inside.
The fabric stretched a little as I sewed it, I probably should have used a walking foot. Most places it came good with a wash and a steam but it has meant that the sleeves are a little but puckery where they are set in. Just enough to annoy me but not enough to be bothered redoing.
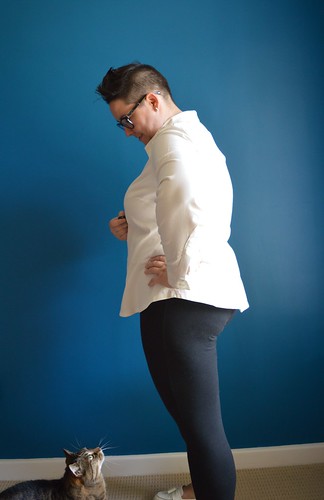
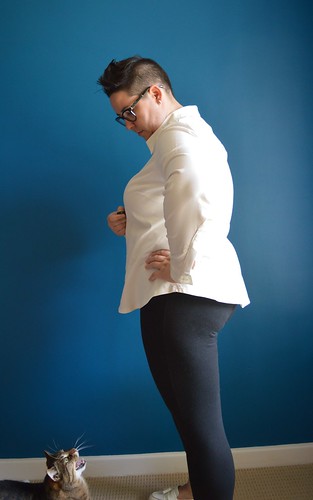
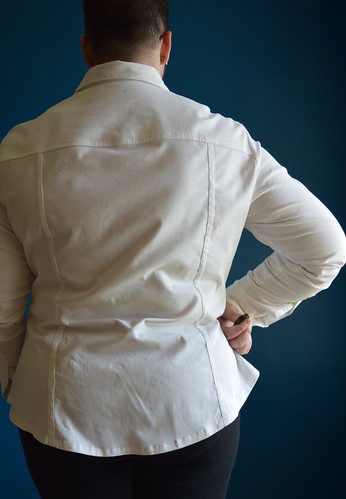
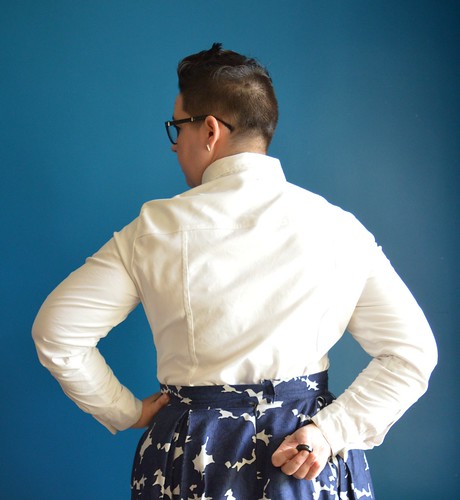
I could probably have taken a slice out at the back for my swayback, as you can see it bunching – it’s worse when tucked in to something because it sort of bunches on top of the waistband. Something to think about for next time.
I don’t have any nice iron in interfacing and I had read about interfacing with silk organza, so I did that. I basted the organza to both pieces – i.e. both the under and upper collar, rather than just the under – for extra oomph. I was worried it would be less crisp than regular interfacing but actually it’s perfect. Crisp without being heavy. I’m not sure how it would go on a lighter fabric, though.
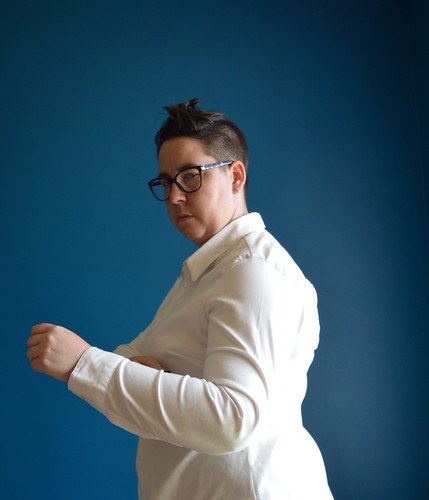
I’m in love with the darted sleeve. I feel so proud of it! It does make the sleeve very irritating to iron though, because it’s an odd shape – although I realised afterwards that I have a sleeve board now and that probably would have made it easier! Initially I was thinking that I could stand to lose another ½” off the sleeve length, but now I’ve worn it a few times I’ve decided it’s perfect.
It’s only the second or third time I’ve done a tower placket and for some reason I just could NOT make my brain understand it. The first one I did came out really well but the second one is a bit wonky. I was sewing and ironing this thinking ‘I just have to keep practicing, and one day I’ll be able to do a tower placket without even looking at the instructions!’ One day.
I thought about putting the pockets on this but I can’t find my paper pattern, only the pieces I traced, and I didn’t trace that piece. So no go, which I think was the right decision anyway. I’m honestly not sure where the pattern could be – I remember putting it with the envelope of traced pieces and now I just can’t find it. Luckily I put the instructions in with the traced pieces! I hope it turns up because I would like to compare it with the Oakridge blouse which I also have, because I’d like to make that up but don’t want to do a bunch of muslins if I don’t have to, so if they’re similar I can mash up the Oakridge with my adjusted pattern.
I also neglected to mark the cuff and collar stand buttonholes on the pattern pieces I traced, so I had to guess where to put them. I don’t think I did a good job with the collar stand one! It’s right at the edge. The buttons are from my stash – I have a huge tub of white buttons I got at an op shop, all sorted out. Thank you to whoever’s stash this came from. I had seven of the ones I liked so I used those for the front and some similar-ish ones for the cuffs. They look close enough that I won’t notice.

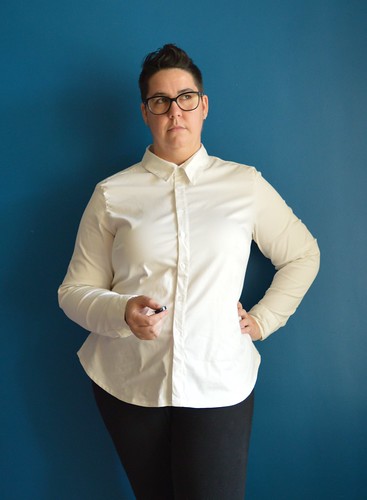
I did cut the wrong side for the button placket though! I didn’t have quite enough fabric to cut it out again, so I just went with it. I thought I would find it confusing to button because it’s the opposite to what I’m used to but actually I don’t notice, so therefore I don’t care!. I can’t tell if I cut the placket slightly off grain or just sewed it wonky, but I had to do a bit of manipulating to get it to sit right. I will be extra extra careful with it next time, because that IS annoying. I place dthe buttons by finding my bust point and putting a button there, and then using the set spacing on the pattern piece to mark the others.
I also wish I hadn’t added to the sides, because now they stick out a bit oddly. I don’t think I’ll go back and take it in but I really wish I could find that dang pattern so I could revert it back to a straight size 16 at the sides.
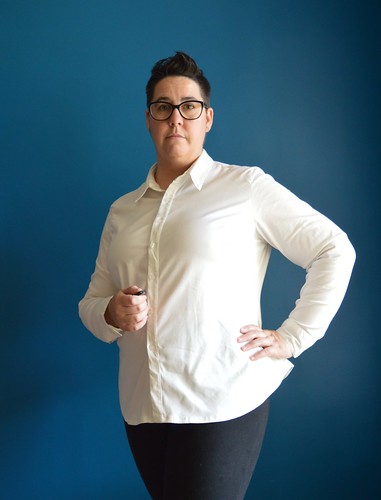
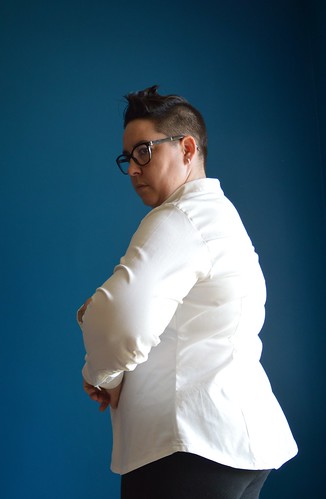
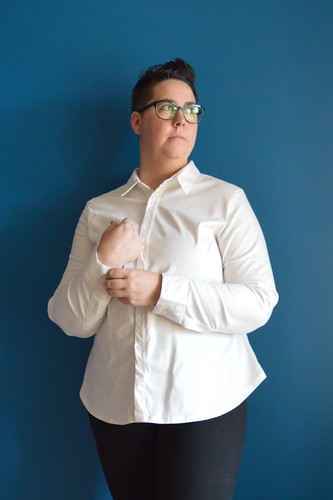
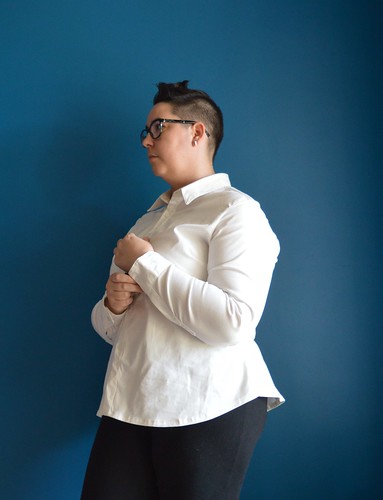
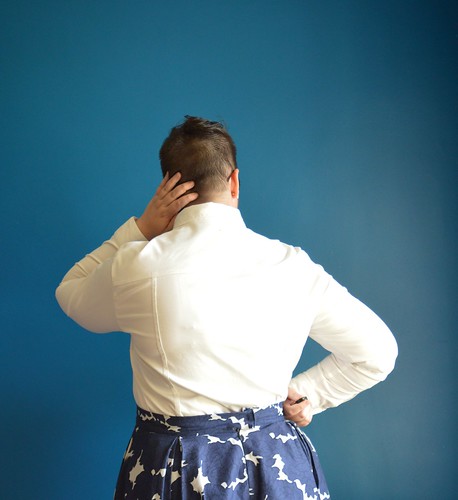
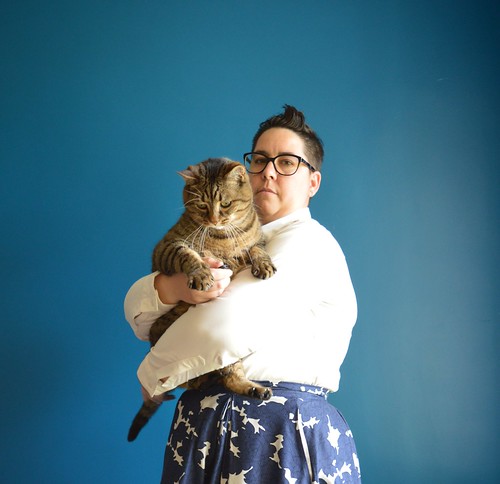
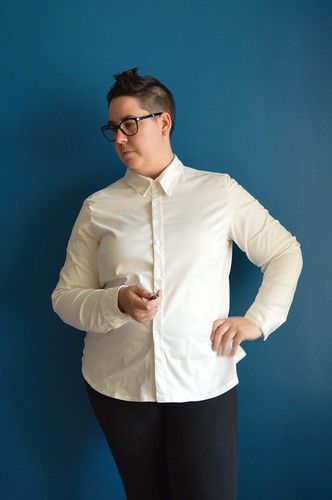
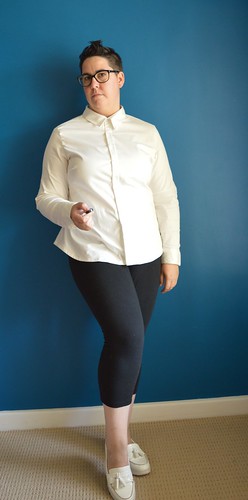
I really like how it looks buttoned all the way up, however I don’t wear it that way because it feels a bit chokey. I also notice myself tugging at the front and pulling it forwards. Having watched how it sits, I think this is because of where the collar is. I have a forward neck, and so the collar sits back off my neck – see the extreme version above – and therefore sits back further on the front of my neck than is comfortable. When I tug it so the collar is comfortable, the shoulder seam sits a 1/2″ too far forward.
I can see various other ways that the collar is pulling the rest of the shirt off, too. When the top button is undone you can see drag lines from the second button. When I tug it forward it sits nicely, and if I arrange the collar so it’s not being pulled by my neck it sits nicely. So I think it’s coming from that issue.
I can’t find much information about adjusting for this, though. I did just buy ‘Fit for Real People’, finally, and am waiting for it to be delivered, so perhaps that will enlighten me? I have thought about how I would adjust this and cut out another shirt with my made-up adjustment so I guess we’ll see!
I don’t feel it pulling across the back but it is stretchy fabric – for the next version I’ve given myself a little extra room at the top there. Just an extra 1/2cm or so.
So yes, it’s just short of perfect. But the fabric feels so lush and I’m so pleased with how well put together it is, and the fit is pretty dang close. I learnt a lot making this and am proud of how I did keeping myself patient and doing little bits at a time until it was done. I feel pretty great when I’m wearing this one – and the first day I wore it five people told me I was looking very fancy, so I’m taking that as a good sign!

This looks wonderful – your hard work definitely paid off with a classic garment!
Thank you so much! It’s nice to have something so simple and classic in my wardrobe, I must say.
It looks great. Worth the effort.
Thank you! I think it was, in the end 🙂
That’s one very fine shirt. I’m very impressed with your persistence in muslin making.
At the time it felt more like stubborness, but it seems to have paid off either way so I’ll take it 😛
Definitely worth the effort to get a good fit on a button up shirt. And the bonus is using this to help other button up patterns fit well. It looks great on you!
Thank you! I feel great in it. I’m already planning to use it to help me fit a shirtdress… only have to invent the wheel once, even if it did take months and months! XD
Well done! Your shirt turned out really fantastic. I did the same thing last summer, making multiple muslins to get the perfect shirt pattern. Tedious as hell, but well worth it in the long run. I printed out a really great placket tutorial from the Threads magazine website and use it and their template for all my shirts. I had the opposite problem with my collar in that it was too high in the back. I lowered the neck on the back yoke by a half an inch and it made a big difference. You might try raising the back neckline and/or lowering the front to help with the fit around the neck. Also, I actually really like how your shirt flares out slightly at the sides. It gives it a sort of vintage 50’s look and I think it’s a really cute design detail!
It felt frustrating and tedious at the time but was definitely worth it. I’m glad I kept tweaking because I learnt a lot and the end result is great!
I’ll have to see if I can look up that Threads article, all the placket tutorials I found only replicated the information in the instructions – which were otherwise good but somehow that part just didn’t make sense to me. I also couldn’t find anywhere saying how to figure out how to not end up with it opening backwards – I lucked out and got it right but I basically flipped a coin!
I’ve already cut out another version and that raising of the back neck and lowering of the front is what I did. I haven’t sewn it up yet so we’ll see! I couldn’t find anything about it anywhere but that seems to make sense to me. I hope it works!
Thanks for your lovely compliments 🙂
Thanks for writing up such a detailed post! I know how much time it takes, and it’s a wonderful resource for those of us who aspire to make a well-fitting shirt. I think you got a great result and am looking forward to future refinements.